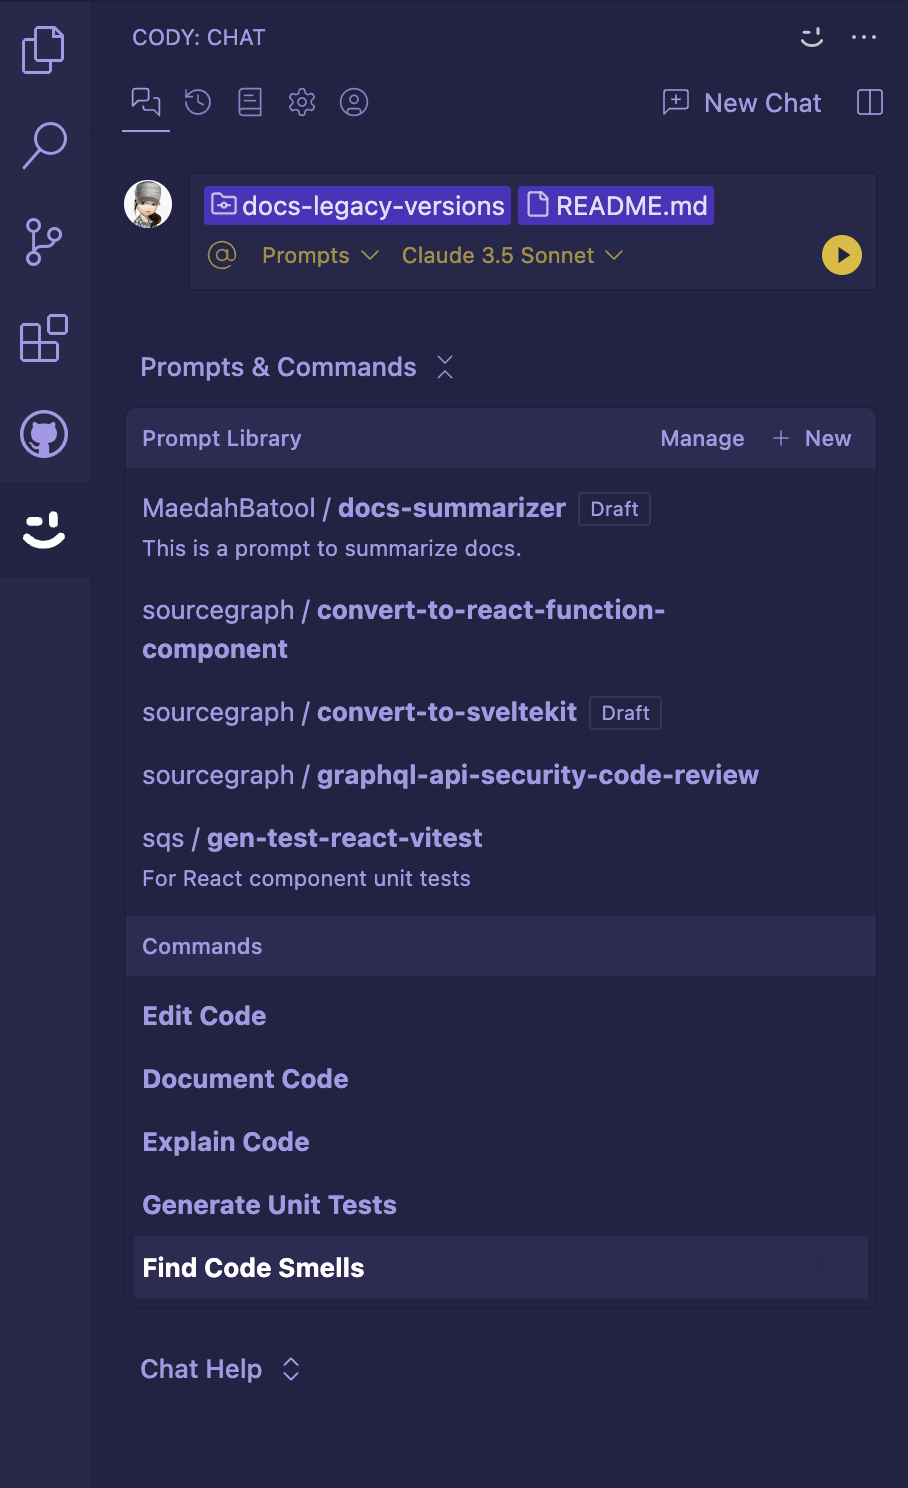
Prompts and Commands
Learn how prompts and commands can kick-start your workflow.
Prompts
Apart from these ready-to-use commands, you can create your own prompts from the Prompt Library via the Sourcegraph's Web UI. From here, you can easily create, edit, share, and discover prompts you’ve created or have been shared within your organization.
Prompt Library
The Prompt Library can be accessed from the Tools > Prompt Library in the top navigation bar in Sourcegraph's web UI. From here, you can view, create or edit a prompt. You can also search for prompts, filter the list to find a specific prompt by owner, and sort by name or recently updated.

Create and edit a prompt
Click the New prompt button on the Prompt Library page to create a new prompt.
- Select the Owner and Name of the prompt
- Then, write a prompt description
- And finally, fill out the Prompt template box with all your prompt instructions
- Moreover, you can mark your prompt as Draft. This would prevent it from being available to other users
- Once done, click the Create prompt button
Completing this process will do the following:
- The new prompt will be added to the Prompt Library page
- If it's not a draft, it will be available to other users in your organization
- The prompt will start appearing via your connected Sourcegraph instance inside Cody's VS Code extension and the Sourcegraph Web UI

To edit a prompt, click the Edit button next to the prompt in the Prompt Library and make the necessary changes. You can also use this interface to transfer ownership of the prompt or delete it from this view.
Using prompts
Prompts work in the same way as commands. Inside Cody's chat window there is a drop-down called prompts next to the LLM selector. Use this to select a prompt and run on your codebase.

Commands
Cody offers quick, ready-to-use commands for common actions to write, describe, fix, and smell code. These allow you to run predefined actions with smart context-fetching anywhere in the editor. Like autocomplete and chat, commands will search for context in your codebase to provide more contextually aware and informed answers.
Commands are available in VS Code, JetBrains, and the Sourcegraph web app. Commands can handle tasks like:
- Editing and fixing code
edit - Explaining code
explain - Generating unit tests
test - Writing documentation
doc - Improving code quality
smell
Support for commands may vary by IDE extension. Read the feature parity reference to learn what commands are available in your IDE.
Running commands
The process of running a command varies from one IDE to another. For example, in VS Code, there are several ways to run a command:
- Select code in the editor and use the Cody commands sidebar to run a command:
- Run Cody: Commands in the VS Code command palette.
- Right-click in the editor and select a command in the Cody submenu.
Custom commands
Custom Commands allow you to create and define reusable prompts for Cody tailored to your development workflows. They are defined in JSON format and will enable you to call CLI tools, write custom prompts, and select context to be sent to Cody. This provides a flexible way to configure Cody to handle use cases like:
- Integrate with your build system to suggest fixes for errors/warnings in the latest build
- Analyze software dependencies output to explain compatibility or suggest upgrades
- Read test command failures to explain and suggest fixes
- Explain code quality output like linter warnings
Creating a Custom Command
You can create a custom command by editing the configuration JSON file or using the command builder within the VS Code editor. To access the command builder within VS Code:
- Open the Cody commands menu (Cody: Commands in the command palette)
- Select Custom commands > New Custom Command
- Enter the name for your new custom command, such as
my-custom-command. - Next, write a description for the command. For example,
Compare files in open tabsorExplain current directory - Provide the relevant instructions for Cody to follow. This is the
promptthat Cody will use to pass relevant context to the LLM - Then, select one or more options for the context Cody should use to generate responses
- Finally, choose whether to save the command locally or share it with your workspace
- Press Enter to complete the process, and your custom command is successfully created
- You can hit
esckey at any time to discard a new custom command
Running Custom Commands
You can invoke custom commands in 2 ways.
- Run Cody Command: Custom Commands in the VS Code command palette.
- Right-click in the editor and select Cody > Custom Commands.
Then select the command you want to run. If your custom command expects a code selection, be sure to select code in the editor before running the custom command.
Configuring file paths
Custom Commands can be defined in the following two file paths:
- User Settings (
~/.vscode/cody.json): Stored locally. Use this for personal commands to use across all your projects - Workspace Settings (
.vscode/cody.json): Stored in your project’s repository. Use this to share commands with others working on the same codebase and for project-specific commands
If you select User Settings, the new custom command will only be available to you. If you select Workspace Settings (as an enterprise user), the custom command will also be available to your teammates.
See the examples and configuration properties below for more details on configuring custom commands.